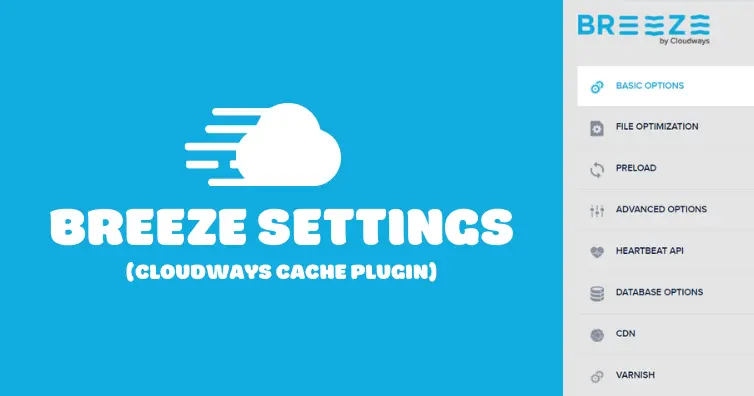
Cloudways released a few big updates to Breeze, so it’s time to write a tutorial on the Cloudways Breeze settings.
I still use FlyingPress since Breeze lacks features and stability compared to other cache plugins (you can see the list of lacking features and workarounds). The good news is they’re making improvements and added JavaScript delay, heartbeat control, preload fonts, and prefetch. It only has a 3.8/5 star rating, but I’m hoping they continue to improve the features and stability.
Most Breeze settings are similar to what you’ll find in other cache plugins like WP Rocket and FlyingPress, so it should only take a few minutes to setup Breeze and test your TTFB/load time. Cloudways also has a Breeze tutorial but it pretty much echoes the descriptions in the plugin.
1. Basic Options
- Cache System – On – you obviously want to enable caching in your cache plugin.
- Purge Cache After – 1440 – this is the cache lifespan which is set to 1 day. You can increase this number if CPU usage is high or if you publish content less frequently.
- Gzip Compression – On – compress content to reduce the size of HTML, CSS, and JS.
- Browser Cache – On – caches certain files in the browser by adding expire headers.
- Lazy Load Images – On – extends settings to lazy load iframes and use native browser lazy load. I would personally use Cloudflare Enterprise for image optimization (not Breeze) which comes with Mirage + Polish. Breeze doesn’t have settings to exclude images from lazy load, lazy load background images, or replace YouTube iframes with a preview image. There’s also no option to preload images, add missing image dimensions, use WebP, or resize images for mobile. TLDR: use a CDN or dedicated image optimization plugin instead.
- Cross-origin Safe Links – On – adds “noopener noreferrer” to external links which improves security by preventing access to websites where the link is located (noopener) or by hiding referral information (noreferrer). These shouldn’t affect your SEO + affiliate links.
- Cache Logged-in Users – Off – most sites shouldn’t need to cache logged-in users unless you’re running a membership website or similar, in which case you would select the roles.

2. File Optimization
These settings should be tested on whether they break your site or improve web vitals. If a minification setting breaks your site, instead of disabling it, it’s better to find the problematic files in your source code and exclude them from minification so your other files can be minified.
HTML Settings
- HTML Minify – On – reduces HTML file sizes by removing whitespaces and comments.
CSS Settings
- CSS Minify – On – reduces CSS file sizes by removing whitespaces and comments.
- Font remain visible during load – can fix the ensure text remains visible during webfont load PSI recommendation by adding font-display:swap to your font’s CSS. This sets a fallback font to load while your normal font is loading which prevents FOIT (flash of invisible text) but causes FOUC (flash of unstyled content). It’s a tradeoff, so test both.
- Include Inline CSS – On – also minifies inline CSS (CSS located in your HTML files as opposed to external CSS). Sometimes it can break your site, so test this setting carefully.
- Combine CSS – Off – according to WP Johnny, only sites with small CSS/JS files should combine while larger sites shouldn’t. Check CSS/JS sizes in your GTmetrix Waterfall chart.
- Exclude CSS – if you enabled CSS minify/combine and it’s causing issues, find the problematic files in your source code and add them to exclude them from minify/combine.
JS Settings
- JS Minify – On – reduces JS file sizes by removing whitespaces and comments.
- Combine JS – Off – same concept as combine CSS only for JavaScript. Again, check your GTmetrix Waterfall chart and only combine when your JavaScript file sizes are very small.
- Include Inline JS – On – same concept as include inline CSS but for inline JS files.
- Exclude JS – if JS settings are causing issues, find problematic files and exclude them.
- Move JS Files to Footer – many themes and plugins already load JavaScript files in the footer, but if you have JS files that aren’t and they’re loaded in the header, you can add them here (minified files aren’t supported). Be careful since it can easily break your site.
- JS Files With Deferred Loading – deferring JavaScript can fix the render-blocking resources PSI item, so that’s a good starting point to learn which JavaScript files you should defer. But any JavaScript file that isn’t needed for initial page load should be deferred. If you don’t want to add JavaScript files manually in Breeze, try Autoptimize.
- Delay JS Inline Scripts – On – delays inline JavaScript until user interaction. View my list of common JS files to delay (you will enter the keywords, not the full files). Often used for third-party JS loading below the fold like AdSense, Analytics, Facebook Pixel, comments.

3. Preload
- Preload Webfont – PSI may tell you which fonts to preload under “preload key requests” but a general rule is to only preload fonts if they’re in the CSS file or load above the fold. You can also use it to preload CSS files, but be careful and test your results if you do that.
- Preload Links – On – when uses hover over a link, that page will download in the background so by the time users actually click it, the page will appear to load instantly. However, enabling this can increase CPU usage if your visitors hover over lots of links.
- Prefetch of DNS Request – view your “reduce impact of third-party code” report in PSI. Copy all third-party domains loading on your website and enter them here (except for Google Fonts + CDN URLs which should use preconnect). This helps browsers anticipate third-party domains and loads them slightly faster, but it likely won’t improve web vitals.

4. Advanced Options
- Never Cache URL(s) – exclude URLs from the cache (mainly for WooCommerce sites or similar). Cloudways recommends that if you exclude them here, you should also exclude them from Varnish under Application Settings → Varnish Settings → Add New Exclusion.
- Cache Query Strings – Breeze doesn’t cache query strings by default (URLs which look like this: ?model=mercedes). If you need to cache these, you will need to add them here.
- Disable Emoji – On – removes a small JS file (if you want to use emojis, just use Unicode).

5. Heartbeat API
- Control Heartbeat – On – if you check your Cloudways analytics (under Application → Monitoring), you may see an excessive amount of requests to admin-ajax. Disabling or limiting the Heartbeat API can lower these requests and CPU usage. While it’s ideal to disable it completely, make sure you’re OK with disabling real-time plugin notifications, seeing when other users are editing posts, and other functionality from the Heartbeat API.
- Heartbeat Front-end – Disable – most websites shouldn’t need Heartbeat here.
- Heartbeat Post Editor – Every 5 minutes – you may want autosaves, so limit it here.
- Heartbeat Back-end – Disable – you shouldn’t need to use Heartbeat in the backend.

6. Database Options
I would clean everything except post revisions. It would be nice to see an option to keep some post revisions (5 for example, so you have backups) and scheduled database cleanups. As with all cache plugins, you should install WP-Optimize once in a while to do a more thorough cleaning of your database. This lets you delete tables left behind by old plugins and see which plugins/modules add the most database overhead. Breeze (and all cache plugins) don’t do this.

7. CDN
- Activate CDN – On – only turn on if you’re using another CDN besides Cloudflare. I use Cloudflare + BunnyCDN which is also recommended by Gijo Varghese (see his Facebook post below). If you’re not using a CDN that uses a CDN URL, you would leave this leave off.
- CDN CNAME – paste the CDN URL here if your CDN uses one. In addition to using the BunnyCDN plugin, adding the CDN URL to your cache plugin can help serve more assets.
- CDN Content – wp-includes and wp-content are the typical directories used by CDNs to serve content, but you can include more by specifying directories you want to be served.
- Exclude Content – you usually want all static files served by the CDN, so leave this as-is.
- Relative Path – On – leave this on to use a relative path URL (the full URL of your website).

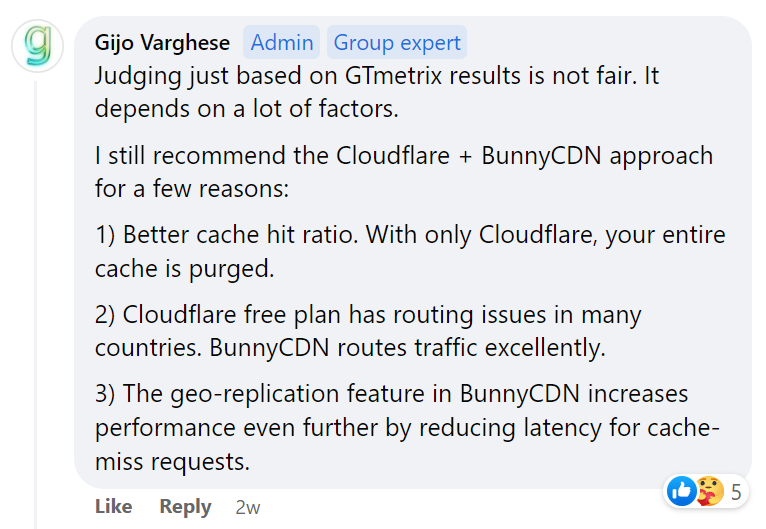
My BunnyCDN guide shows you how to set up BunnyCDN and walks you through the settings. One (paid) feature I would definitely consider is geo-replication (perma-cache).
8. Varnish
- Auto Purge Varnish – On – automatically purges Varnish (Cloudways says to enable it).
- Varnish Server – this is your Varnish server IP address which is added automatically.
- Purge Varnish Cache – purge if you make design or other changes and don’t see them.

9. Lacking Features
Since Cloudways Breeze lacks many features needed for core web vitals, you’ll need several extra plugins to address image optimization, local fonts, critical CSS, etc. Or just use FlyingPress.
Plugins I Recommend Using With Breeze
- Autoptimize
- OMGF
- Perfmatters
- WP-Optimize
- WP YouTube Lyte
- ShortPixel (or Cloudflare Enterprise with Mirage + Polish)
| Breeze | WP Rocket | FlyingPress | |
|---|---|---|---|
| Remove unused CSS | x | Inline | Separate file |
| Critical CSS | x | ✓ | ✓ |
| Host fonts locally | x | x | ✓ |
| Preload images | x | x | ✓ |
| Fetchpriority resource hint | x | x | ✓ |
| Lazy render HTML elements | x | x | ✓ |
| Lazy load background images | x | Inline | Helper class |
| Exclude images from lazy load | x | By URL | By Number |
| Preview image for YouTube iframe | x | ✓ | ✓ |
| Self-host YouTube placeholder | x | x | ✓ |
| Add missing image dimensions | x | ✓ | ✓ |
| Scheduled database cleanups | x | ✓ | ✓ |
| Documented APO compatibility | x | x | ✓ |
10. More Cloudways Optimizations
A few tweaks you can make in Cloudways to improve speed:
- Enable Varnish
- Enable Redis (installed as drop-in plugin)
- Use PHP 8.0
- Use MariaDB 10.4
- Increase memory limit to 256MB+
- Increase PHP-FPM memory limit
- Replace wp-cron with a real cron job
- Check your analytics (Monitoring) to find bottlenecks
- I use Cloudflare Enterprise but wish it had more settings
- max_execution_time: 30-60s, max_input_time: 60s, max_input_vars: 1000 (what I use)
Final Thoughts – while Breeze still needs improvement, I’m still a fan of Cloudways and used Vultr High Frequency for quite some time (after moving from SiteGround). They need to give a little more love to the Breeze plugin and I think it will make Cloudways a more attractive host.
Cheers,
Tom

Whats the difference between lazy load image and preload images?
Lazy load is when images are only loaded as you scroll down the page. Preloading is basically making the image “high priority.” Since above the fold images are the ones you see immediately, they should be excluded from lazy load and preloaded.